Services
Device Support
Welcome to Community Wellness Instruction Booklet
The enclosed medical tracking devices will record your vital signs and sync with our proprietary MyWellness Connect™ app so you and your doctor can monitor your vital signs and quickly address any concerning readings.
Welcome to ConnectedCare™ with Community Wellness!
In addition, we will pair you with a dedicated clinical coach who will meet with you monthly and review your vital signs and other steps you can take to maintain or improve your health
Setting up and pairing your medical devices is easy and straightforward. Give it a try by following the directions
on this sheet.
You can even earn rewards through our Stronger Together™ online community by successfully setting up your device. Your coach will explain more about our rewards program during your first virtual visit.
Being proactive in your wellness is a step in the right direction toward better health. Let’s get started!
Download the MyWellness Connect App
- Have your enclosed medical devices readily available.
- Ensure your phone or tablet has Bluetooth enabled (on).
- Check that you are connected to a WiFi network.
- Download the MyWellness Connect™ app from the Apple App Store or Google Play or simply scan the QR code below with your phone’s camera:

- Open the MyWellness Connect™ app and tap “login” using the same email and password you used to create your Community Wellness account.
You’re now ready to connect your device(s) to the app!
Setting up & pairing your devices
- 1. Install the batteries that come with your device(s).
- 2. Open the MyWellness Connect™ app on your phone/tablet.
- 3. Tap the menu icon on the top left-hand side of the home screen (dashboard) and then tap on “My Devices”.
- 4. Turn on your device.
- 5. From the app, tap on “Add New Device”.
- 6. The app will automatically find the device. Tap on the “Add to My Devices” button that appears below the image of the device.
- 7. You will now see the device listed on the “My Devices” screen.

We are here to help
Visit our Youtube channel for videos to help guide you through the process: Click here.
Updating the Android app
1. Open the Google Play Store app.
2. At the top right, tap the profile icon.
3. Tap “Manage apps & device.” Apps with an
update available are labeled “Update available.”
You can also search for a specific app.
Updating the Apple app
1. Open the Apple App Store.
2. Tap your profile icon at the top of the screen.
3. Scroll to see all available updates and release notes. Tap “update” next to an app to update that app or tap “Update All” to update all available apps.
Navigate the MyWellness Connect™ app
Login
1. Open the Apple App Store.
2. Tap your profile icon at the top of the screen.
3. Scroll to see all available updates and release notes. Tap “update” next to an app to update that app or tap “Update All” to update all available apps.
Logout
1. Open the app.
2. Type your email address in the “Email” field.
3. Type your password in the “Password” field.
4. Tap the “Login” button.
Manually entering reading steps
1. Open the app.
2. Tap the menu icon on the bottom or top left-hand side of the home screen (dashboard) and then tap on “Vitals”
3. Tap the “Add New” button and select “Measurement manually”
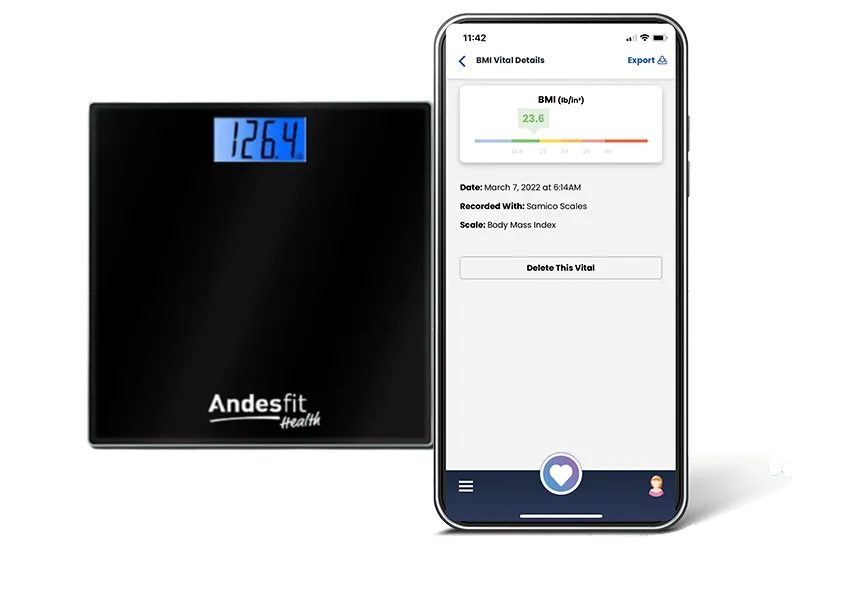
How to Use the Scale
- 1. For best results, make sure the scale is placed on a flat, hard surface. (Carpeting or uneven floors may affect accuracy.)
- 2. Open the Community Wellness “MyWellness Patient Portal™” app. Make sure the Bluetooth on your phone is activated and you have an internet connection
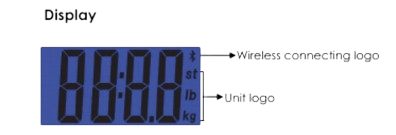
- 3. Step onto the scale platform and remain still. The display on the screen will flash three (3) times until reaching the final reading.
- 4. Once the measurement is captured, verify it on the app screen and tap the “Save and Close” button.
- 5. When the measurement is saved, it will be displayed on the Weigh listing on the home screen (Dashboard) with the last synced date below it.
- 6. To view the history of your weight measurements, tap on the Weight listing on the home screen (Dashboard).
Check the video instructions
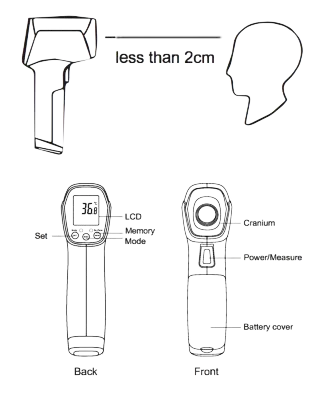
How to Use the Thermometer
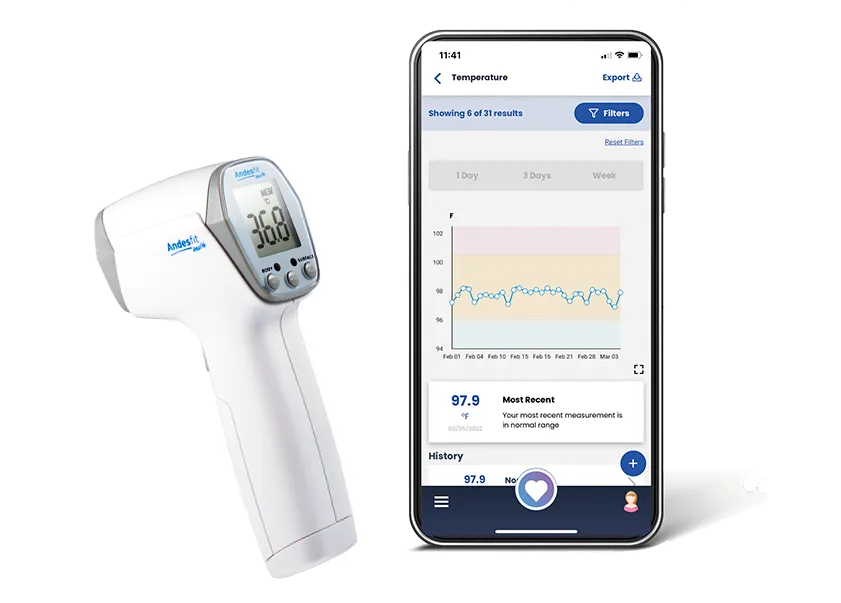
- 1. Open the Community Wellness “MyWellness Patient Portal™” app. Make sure the Bluetooth on your phone is activated and you have an internet connection.
- 2. Turn on the thermometer by pressing the gray “MEM” button. You may need to hold the button down for 2-3 seconds — the device will beep when it’s ready
- 3. Position the thermometer pointing towards the forehead at a distance of less than 2 cm.
- 4. Press and hold the button on the handle, and move the thermometer across the forehead, keeping that 2 cm distance.
- 5. Release the button on the handle to finish the measurement. The result will display on the LCD screen on the thermometer.
- 6. Once the measurement is captured, verify it on the app screen and tap the “Save and Close” button.
- 7. When the measurement is saved, it will be displayed on the Temperature listing on the home screen (Dashboard) with the last synced date below it
- 8. To view the history of your temperature over time, tap on the Temperature listing on the home screen (Dashboard).
Check the video instructions
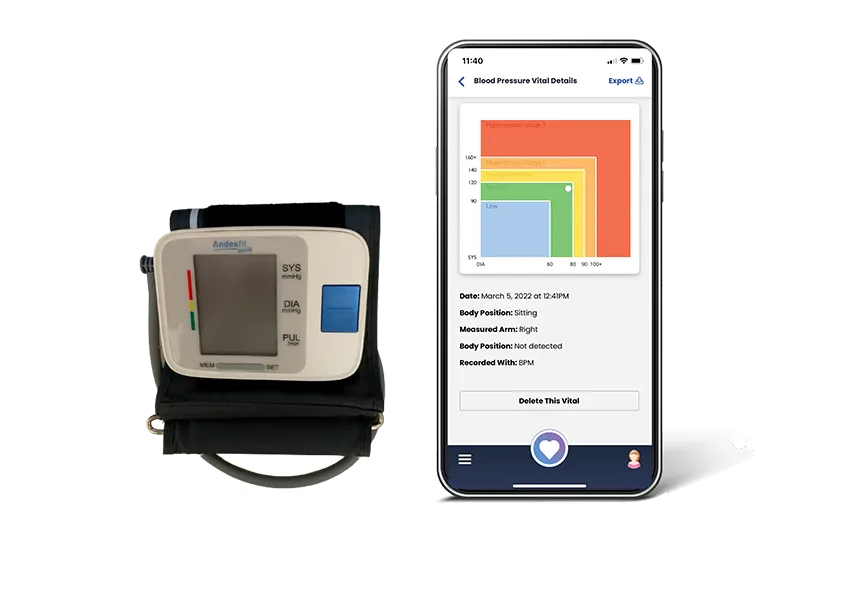
How to Use the Blood Pressure Monitor
- 1. For best results, rest for at least 30 minutes after exercising, eating, smoking, drinking alcohol or bathing. It’s important to not have any tight clothing on your upper arms and to sit quietly with both feet firmly on the ground, without crossing your legs or moving your arm or body, while you take your blood pressure.
- 2. Open the Community Wellness “MyWellness Patient Portal™” app. Make sure the Bluetooth on your phone is activated and you have an internet connection.
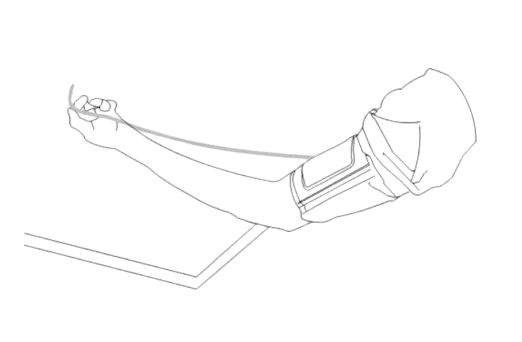
- 3. Put the cuff on your upper arm, pulling on it so that it wraps securely around your upper arm. Make sure the cuff is plugged into the device on the side, before turning the blood pressure monitor on.
- 4. Place your arm on a table so it’s at the same level as your heart.
- 5. Press the blue “Start” button on the device.
- 6. It takes around one minute to take your blood pressure measurement. The cuff will inflate, and when the measurement is complete, the cuff will automatically deflate and your measurement will show on the device’s screen.
- 7. Once the measurement is captured, verify it on the app screen and tap the “Save and Close” button.
- 8. When the measurement is saved, it will be displayed on the Blood Pressure listing on the home screen (Dashboard) with the last synced date below it.
- 9. To view the history of your blood pressure measurements, tap on the Blood Pressure listing on the home screen (Dashboard).
Check the video instructions
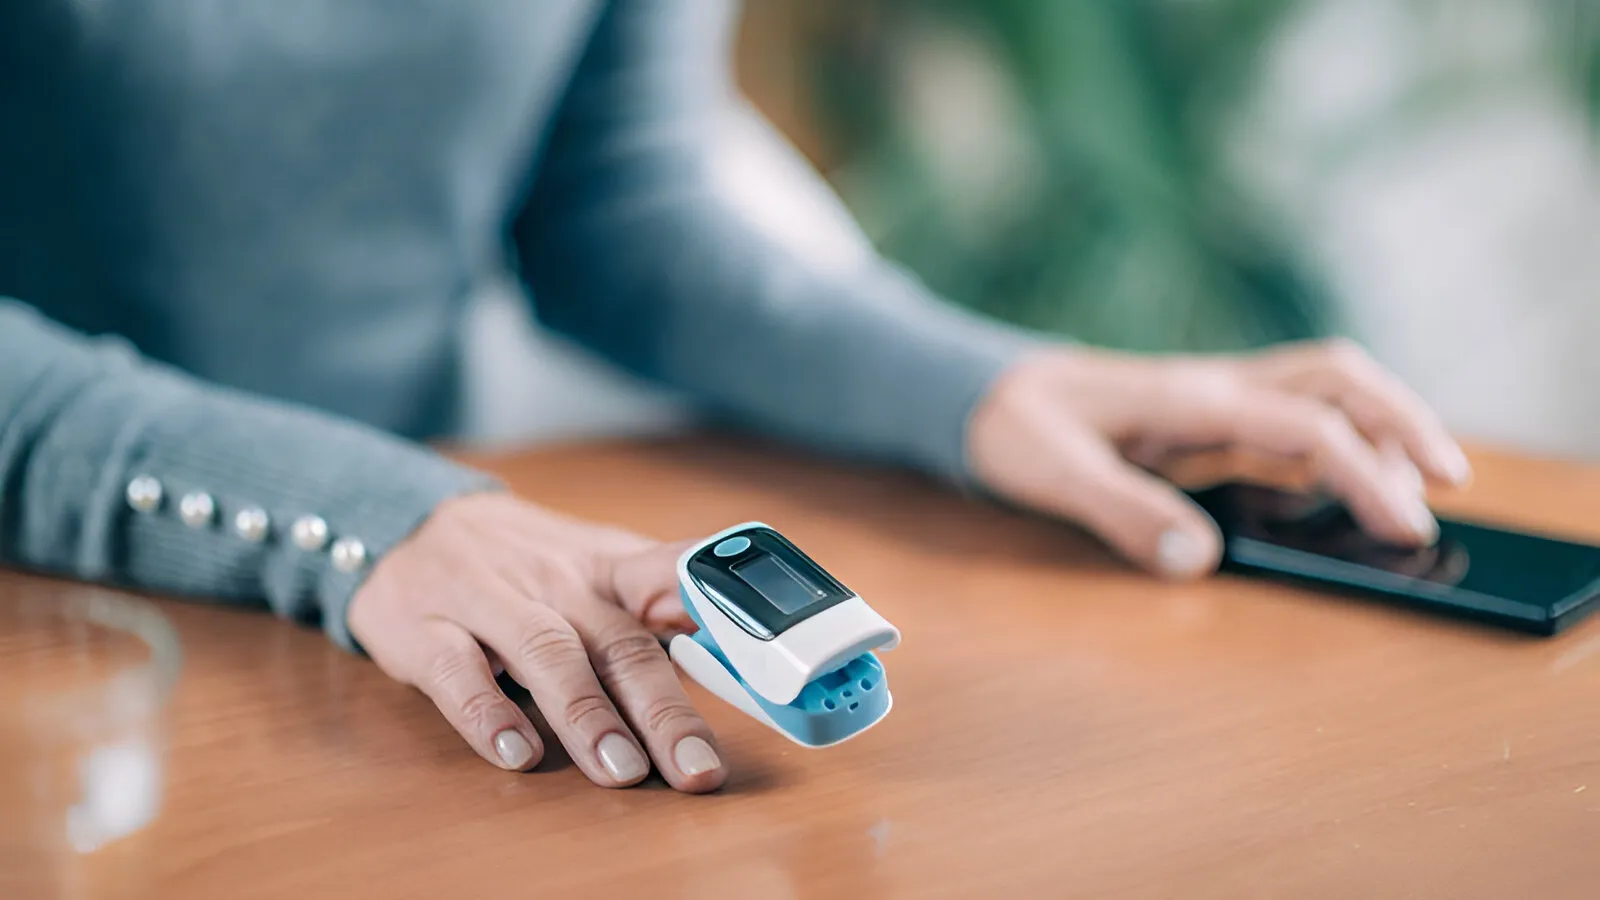
How to Use the Pulse Oximeter

- 1. Open the Community Wellness “MyWellness Patient Portal™” app. Make sure the Bluetooth on your phone is activated and that you have an internet connection.
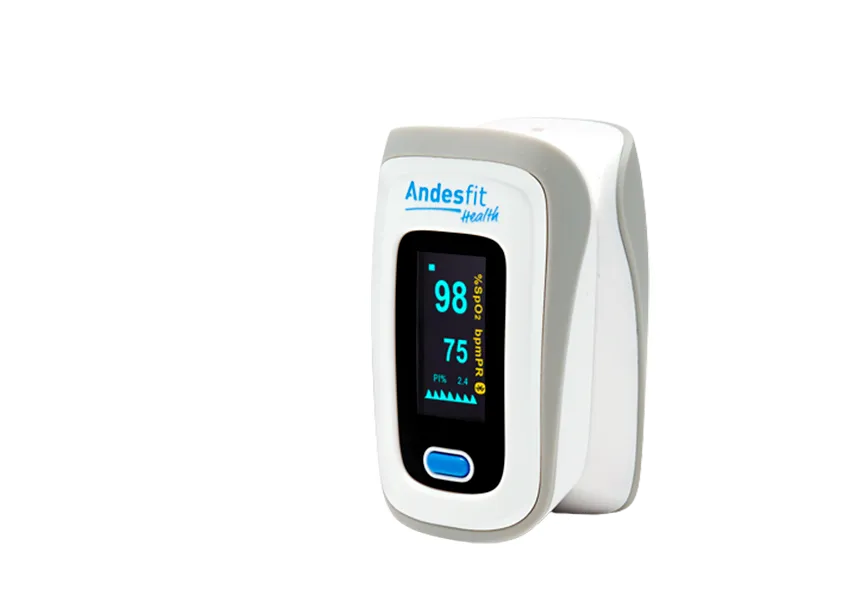
- 2. Open the clamp of the pulse oximeter, and then place your middle, ring, or index finger of your left hand into the rubber opening of the oximeter, nail side up.
- 3. Press the button on top to turn on the device. This will start a measurement. Note: cold fingers may produce an inaccurate measurement.
- 4. Observe the app and keep your finger in the device until the countdown on the screen completes.
- 5. Once the measurement is captured, verify it on the app screen and tap the “Save and Close” button.
- 6. When the measurement is saved, it will be displayed on the Blood Oxygen listing on the home screen (Dashboard) with the last synced date below it.
- 7. To view the history of your pulse and O2 measurements, tap on the Blood Oxygen listing on the home screen (Dashboard).
Check the video instructions
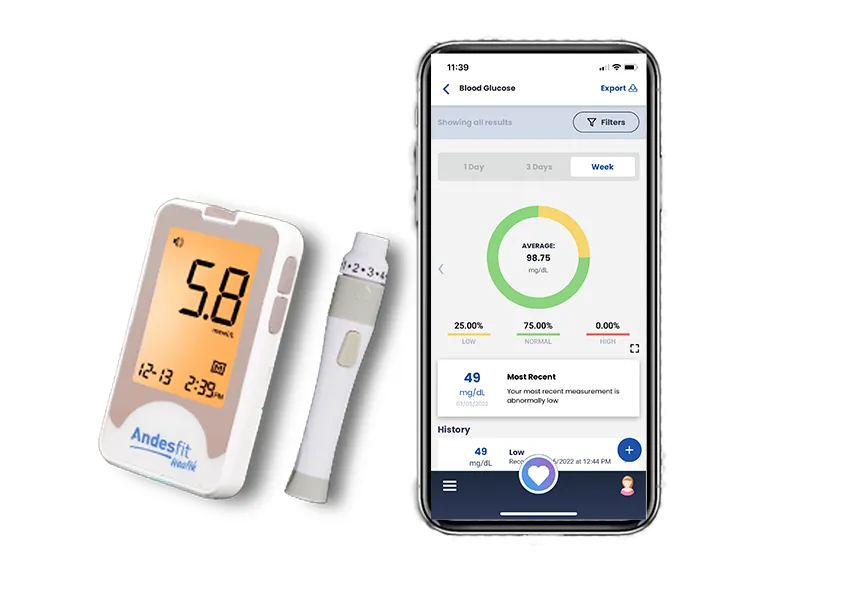
How to Use the Glucose Meter
- 1. Wash your hands with soap and warm water.
- 2. Open the Community Wellness “MyWellness Patient Portal” app. Make sure the Bluetooth on your phone is activated and you have an internet connection.
- 3. Remove a test strip from its vial. With clean, dry hands, you may touch the test strip anywhere on its surface. Do not bend, cut, or modify the test strips in any way. Remove the test strip from the vial and use it instantly.
- 4. Insert the test strip into the meter’s test port to turn the meter on. The date and time appears on the screen. NOTE: Be sure to use “AndesFit” test strips, or other test strips may not produce accurate results. If you need more test strips or lancets, please call our Customer Support team, (888) 690-3696.
- 5. When the blood drop symbol flashes on the meter’s screen, apply your blood to the absorbent hole of the test strip.
- 6. As soon as enough blood has filled the confirmation window of the test strip, you will hear a beep letting you know that the test has begun. A countdown of five (5) seconds starts. NOTE: Make sure the confirmation window of the test strip is completely filled with your blood sample.
- 7. Once the measurement is captured, verify it on the app screen, select the appropriate tag for ‘Meals’, and tap the “Save and Close” button.
- 8. When the measurement is saved, it will automatically be displayed on the Blood Glucose listing on the home screen (Dashboard) with the last synced date below it.
- 9. To view the history of your blood sugar measurements, tap on the Blood Glucose listing on the home screen (Dashboard).
Check the video instructions

Check the video instructions
How to Use the Spirometer

Check the video instructions
- 1. For best results, stand up or sit upright.
- 2. Push the turbine into the slot until it stops.
- 3. Turn the turbine clockwise until it stops.
- 4. Insert mouthpiece at least 0.5 cm into the turbine socket.
- 5. Open the Community Wellness “MyWellness Patient PortalTM” app. Make sure the Bluetooth on your phone is activated and that you have an internet connection.
- 6. From the app’s Vitals screen tap the “Add New” button and select “Spirometry” to enter the New Spirometry Test screen.
- 7. Wait until the app’s New Spirometry Test screen prompts you to “Blow now!”.
- 8. Hold the meter with your hand as if it were a cell phone and make sure not to obstruct the turbine with your hand.
- 9. Insert the mouthpiece end into your mouth beyond your teeth, and close lips around the mouthpiece. Make sure your lips form a tight seal around the mouthpiece. (To prevent turbulence that might otherwise affect the results do not put your tongue in the mouthpiece. Do not bend your neck.)
- 10. Take a slow deep breath as deep as you can and then blow out as hard and fast as you can until you can read the measurement on the New Spirometry Test screen. (Avoid long slow exhalation.)
- 11. Since each test session should consist of three trials, repeat step 10 twice more.
- 12. Once the measurement is captured, verify it on the app screen and tap the “Save and Close” button.
- 13. When the measurement is saved, it will be displayed on the Spirometry listing on the home screen (Dashboard) with the last synced date below it.
- 14. To view the history of your spirometry measurements, tap on the Spirometry listing on the home screen (Dashboard).
Check the video instructions
FDA approved + Bluetooth ready
Have a Device Question? Contact the Community Wellness Team Now
Fill out this form for more information or to set up a detailed demo.
- Hello@CommunityWellness.com
- (352) 282-0628
- Campbell, CA 95008